Thursday, May 20, 2010

Punched Hippo


This cute little guy is from an online punch class I took from Heather Summers; her blog can be found on my side bar here.
It uses the returning Baha Breeze and many punches. Thge DSP is retired from last year's catalogue. He's so cute in real life.

Hope you enjoy him, pop on over to Heather's website and check it out, she has great classes.

Thanks for stopping by,

Sharri

Sunday, May 16, 2010

It's hip to be square!

I have finally manged to get back to my blog......it's been one of those weeks! again. I seem to have alot of those lately, either I'm really busy or much less organized than I used to be.....hmm I wonder what it is?

This is the title of the posting on Leeann Greff's blog where I cased this card from.
It can be found here:

http://flowerbug.typepad.com/my_weblog/2010/04/punch-art-square-flowers-.html


I had to do a punched card for a swap and loved the simplicity of this card so I changed up the colors and cased it. I used Pink Pirouette and Melon Mambo for the pinks and Tempting Turquoise and Brilliant Blue for the blues.

The Scallop Trim Border Punch 1/4 inch Whisper White Gross Grain ribbon and the Circle Ice Rhinestone brads as well as a blue button from the Playground Collection.
The sentiment is from the Hello Stamp set.

The flowers are 3/4 inch squares that have been rounded on opposite corners.

Hope you like this.

Thanks for stopping by!

Sharri

Friday, May 7, 2010

Mother's Day Cards

Traditionally we have a Mother's Day BBQ and have both sides of the family come for supper, and inevitably it rains or even snows. This year both our mothers are away for this day so it'll be a quiet day for us. I made these cards to send with the mothers and for the other mothers in our family.

These cards are all totally cased from several other demos and on-line blogs that I follow.

Hope you enjoy.


I cased this card from Tiffany Bauer: her blog can be found here: www.mycraftyworld.blogspot.com
I used Rich Razzleberry Classic Ink, Cards Stock and Polka Dotted Ribbon along with DSP from the Cottage Wall Collection. The image from Messages for Mom was stamped on Whisper White. I then attached a flower and half pearl from the pretties kit.


This card was cased from Carl Bazhenow's blog found here: www.carlascraps.com
The same image as above was used and then colored with inks and the blender pen. Layers were made from Shades of Spring DSP, Pretty in Pink and Melon Mambo, the edge was punched with the Scallop Trim Border punch. I used the small rhinestone brads found in the pretties kit to finish it off.


The Pink and Green cards were cased from Diana Gibbs, her blog can be found here:
www.stampingwithdi.com

I love the new satin ribbons, the purple one is one I had in my stash but it matches the Shades of Spring DSP perfectly). The sentiment is from Well Scripted set.

The Bermuda Bay card was cased from Jen Sannes, her blog can be found here: www.simpleandsincere.com
This one uses the SAB Welcome Neighbor DSP and the SAB set as well.

Thanks for looking!

HAPPY MOTHER'S DAY to all you mothers!

Sharri

Sunday, May 2, 2010

Scrapbook in a Box

I watched this video tutorial on You-tube showing how to make a Magnolia Flower from the Stampin'Up Ornament punch:

http://www.youtube.com/watch?v=SlczsCli5pg&feature=player_embedded

......and decided to try it out. I used Whisper White cardstock and Pink Pirouette Classic Ink for the flower and I sponged the punches on both sides; otherwise I followed her directions in the video. I was so pleased with the results that I had to put it on something and decided to make a box.

The box is just a 12x12 piece of Pink Pirouette cardstock that is scored at 4" and 8" on two sides, you then cut one score line to the 4" score line on each side of the paper9 make sure it is the same line on each side)
You then fold the box up staggering the sides to create the box.
When opened up the box is actually a scrapbook with 9 sections that are 4x4 to use for journaling and/or pictures.
The sides of the box are decorated with the Bridal DSP that has been colored with Pink Pirouette Classic ink by rubbing the pad over the paper until evenly colored. It's beautiful in real life.
I made the top by taking a piece of Pink Pirouette C/S that measured 10 and 1/8th inches square. I then scored it at 1.5 and 3 inches on all sides then cut and scored as usual for any box top. This one has reinforced sides on it for stability.


I'm on a roll......This next box I created is for my sister whose first grandchild.....Lily was born in February. I decided there had to be a way to make a 3D Lily so I spent the afternoon playing and this is what I came up with. I used Certainly Celery CS and the Bridal DSP again with Classic ink to decorate the sides.
The lilies were created by taking a 2"x8.5" pieces of Whisper White CS; scored and folded at 1" , this I put about one third to half way into the large oval punch, fold to the center of the punch to get a narrow oval with points on the ends. You need 6 for each lily.


I then sponged each fold/score line with Certainly Celery Classic Ink then opened and folded the other way and repeated. I sponged one end of each petal with some Certainly Celery and also a bit of So Saffron Ink to give depth to the center of the flowers.

Next I took one petal and glued an other one to it oneach side of the fold line joining it at the bottom,(it looks like a fan) repeat this again with the other 3 petals. These are 2 halve of the lily, set aside to dry.

For the stamens I used slivers of Certainly Celery CS and So Saffron CS. Fold the yellow CS, 1"slivers in two and glue then fold in half again and glue this to the end of the green sliver(2-3") sandwiching it with the yellow folded over. You need 5 slivers with yellow . Punch out a 1/4" circle and sponge it with Certainly Celery,fold over a the end of a green sliver and glue the circle to it. I then lightly pinched the circle to give it a 3D effect. You could also use an embossing tool to make it 3D as well.

Now to put the lily together I pinched the folds in the petals so the two halves of the flower were easy to fit inside each other and glued these together at the bottom and at the same time putting the stamen slivers into the center of the flower so the ends protrude from the flower like a stem and the stamens are in the center of the flower.
Set aside and let dry well.

When dry use a bone folder or round handled tool or pencil to shape the petals so that the flower is more realistic.

Place them on the top of the box or where ever you want a lily to be.

I hope that gives you some idea and it is not to difficult to follow.

Thanks for stopping by.

Sharri

May 7, 2010 - I just want to say thanks to everyone for all the lovely comments on these
projects, they are very much appreciated, Sharri

Valita Reynolds in Austrailia has created a video to show how she made her interpretation of my Lilies. please go over to her blog and see how she has refined and simplified these flowers.
http://valitasfreshfolds.blogspot.com/2010/06/punched-paper-lily.html
Thank you, Valita for making these flowers come to life. Sharri

Tuesday, April 27, 2010

One layer, Clean and Simple

This is a fun card that I cased the technique from Dawn Griffiths again; here is a link to the video:

http://www.youtube.com/watch?v=60hBONREyfk&feature=player_embedded

she and I have similar styles/tastes I guess.


It's very impressive in real life. I used Whisper White card stock, Orchid Opulence classic ink, the scallop trim border punch and the "With All My Heart" stamp set.

Hope you enjoy and will try this technique.

Have a great day!

Sharri

Saturday, April 24, 2010

Last of Easter....finally!

Here are the last of the Easter items I created this year. I think this is a shortened version on the fancy favor box that I used the Eyelet Border Punch on for the edges of the box and handle and the DSP trim, Tea Party. I needed something to make a quick simple basket for treats, it was very effective and doesn't need to be used only for Easter could be for any special treat.


This next basket is from the Big Shot Die, Baskets and Blooms, I used an Embossing folderon it before putting together, to give it some texture and then embellished it with a punched bunny on
the front and back so you can see him coming and going. He is a compilation of several bunnies I have seen over the season this year. I stamped a tag from the Eggcoutrements set and tied it on with linen thread after putting an eyelet in it. I also used a sparkly brad for his tail for lack of a pom-pom.


Thanks for stopping by,

Sharri

Wednesday, April 21, 2010

2nd half ....

These are the projects that make up the second part of the "Hibernate Until Spring Class". This uses the Eggcellent Egg kit, the Extra Large two step Bird punch and the tiny tag punch all from the Occasions Mini. Jackie Topa really out did herself with this class, it's fun and easy.


This first project is a note card holder, 4x4 cards in a holder made from the punches, bashful blue and whisper white card stock. The sentiments are from the Well Scripted set.

The next card uses The rub-ons in the Eggcellent Eggs kit and the rhinestone jewels in it, as well as the bird punch again. Adding some Whisper White Organza ribbon sets it off. I used a stamp from the tiny tags set for the sentiment.


Hope you enjoyed this, I will post more from this class as I complete them.

Thanks for stopping by.

Sharri

Saturday, April 17, 2010

Easter is past.....

Here are a couple of cards I made for Easter as well. I used a class I purchased from Jackie Topa called Hibernate until Spring. It's a 10 week class that uses the Eggcellent Eggs kit in the Occaisions Mini catalogue. Cards stock for this class is Soft Subtles
These are from the first week.

The first card uses the Two Step Bird punch (wings) to create the flowers; very simple but fun. The flower centers are from the kit.

The next card uses the dots embossing folder, some parts from the kit and stamped image from the Eggcoutrements set some punches and the sentiment for both is from the Well Scripted set.


This is only half of the first week I will post the other half soon.

Thanks for stopping by!

Sharri

Friday, April 16, 2010

Abundant Hope, Easter Blessings

I can't believe it's been so long since I posted, so sorry!! I've had these pictures in my camera and forgot about them. After Easter we ran away for a few days and then coming back to work had me busy, busy so that's my excuse.

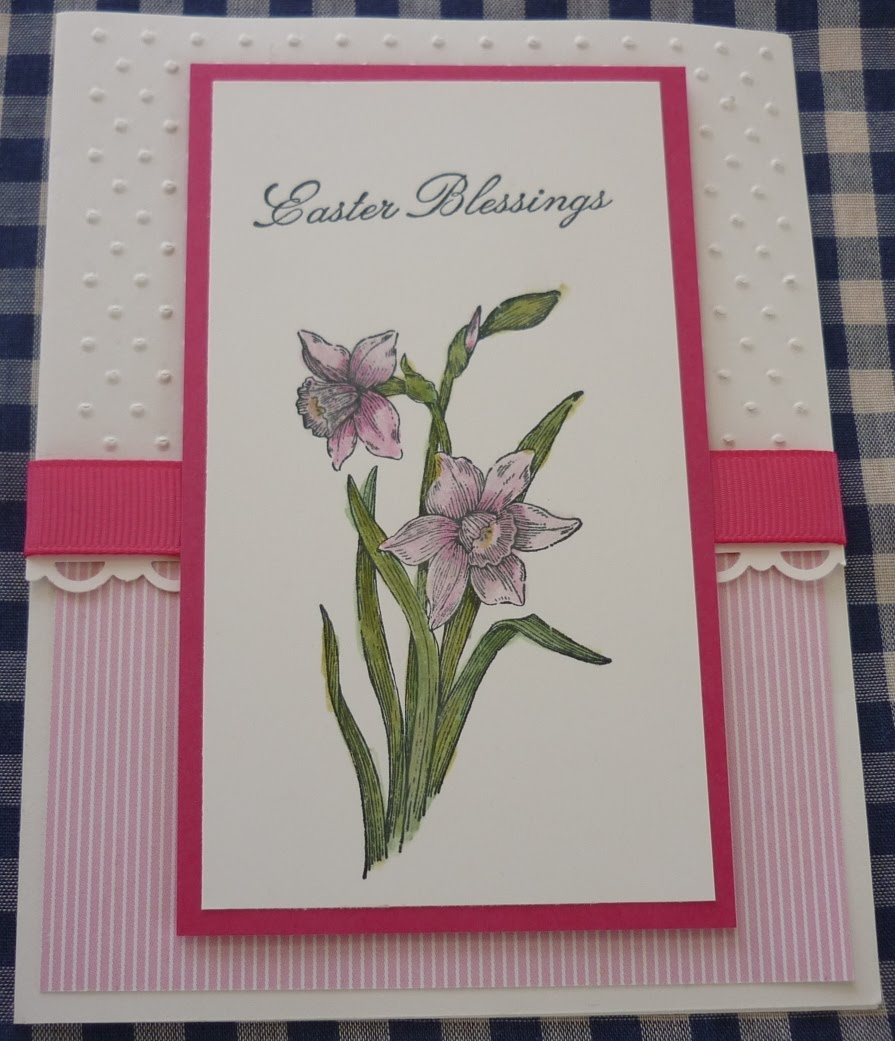
These are some cards I made using the Abundant Hope Stamp set from the current Occaisions Mini along with the Scallop Trim Border punch, Embossing folders and ribbon. The coloring was done with a blender pen and ink so easy to do and once stamped the images are so simple to color.


I have more to share so come back soon to see; I promise it won't be as long between posts.


Thanks for coming by.

Sharri

Thursday, April 1, 2010

Green Beauty!

This pretty card was created using a Certainly Celery card base, the Sweat Pea DSP that was in the Occaisions mini catalogue, the Beautiful Wings embosslit and the new Satin Ribbon. The button is from the Playground button collection in the IBC and the sentiment from the stamp set "With All My Heart". It is a very simple elegant card if I do say so my self.


Thanks for stopping by,
I hope you all have a great holiday weekend!

Sharri

Friday, March 26, 2010

Oriental Vase

Here is a fun card I did for a color swap; the card had to have Red, Black and Yellow on it; this combo screams Asian to me; so I pulled out the Eastern Blooms and Tiny tags stamp sets, I used Real Red, So Saffron and Basic Black card stock, the Scallop Trim border punch from SAB and the Ornament punch that is still available as a write in on an order and the Medium Jewelery Tag punch from the Ocaisions mini catalogue.


The small flowers are from the trio flower punch and a miscellaneous punch that I had, a few black brads and I used a thin strip of card stock to tie the tag to the vase which was created by punching the ornament shape from some so saffron card stock that has been run through the Big shot with an embossing folder, then I cut a bit of the bottom off and Voila! a vase. It's very plain but effective. I liked it.
The strip of yellow on the black border is also DSP from the SAB Welcome Neighbor paper stack.

Hope you have a great weekend!

Sharri

Saturday, March 20, 2010

3D Paper flowers


I've had some fun playing with the 3D paper flowers that you are seeing everywhere. I punched 4 scalloped circles from Sending Love DSP in the Occaisions mini catalogue, spritzed it with some water and then crunched it up into small balls. I then straighten them all out and layered them one on top of each other. I made a hole with a paper piercer in the center and added a Pretty in Pink Corduroy Button/Brad to it, these are available as well in the Occaisions mini catalogue. Next I placed it on a card front cut from Sending Love DSP as well and stamped the Friend image from With All My Heart stamp set.
In the above picture you can see that I also made a flower from the Welcome Neighbour DSP in the SAB catalogue and put a punched flower in the center from a co-ordinating paper from the same pack.
These are simple to do but add so much dimension to your cards and projects. Have fun!

Thanks for stopping by!

Have a great weekend.

Sharri

Wednesday, March 17, 2010

Mini Milk Cartons

This die is so much fun to play with. I've had great fun with it. I created a little basket to carry the pairs in. They're so cute!

This first set was created with the Sweet Pea DSP from the Occaisions Mini catalogue and Chocolate Chip C/S there is absolutely no stamping on these ones. I embellished the milk cartons with the Sweet Pea stitched felt flowers that are also in the mini and closed them with mini library clips. I'll fill them with some goodies for someone.

The basket is created by setting the two milk cartons side by side on my grid paper and then I added 4 inches to each measurement. and cut the card stock rectangle with these measurements. I then scored each side at 1" and 2" on all four sides and created a basic box bottom. The handle for the basket is a 12" length of C/S that has been punched along each side with the scallop border punch and the Pretty in Pink satin ribbon is placed in the centre of the handle and tied at the top.

This next set I made as a hostess gift for a friend who invited us for dinner on the weekend. I used Teaparty DSP, Certainly Celery C/S and the Etelet Border punch for the handle. The ribbon is some I had in my stash that seemed to go well with the DSP. I used the stamps from 2 different sets; Four Square and a retired set and punched them out with the scalloped square punch. I used Pink Pirouette papet to embellish the bottom of the milk cartons after punching a border with the eyelet punch.


Thses were so easy and quick to make. Hope you like them and get a chance to play with these sometime too. Stay tuned for more of these in the future.
Thanks for stopping by,
Sharri


Friday, March 12, 2010

With All My Heart/Love Easel Card

This card is a favorite of mine, it was inspired by Dawn Griffiths, http://www.dawnsstampingthoughts.net/2010/01/easel-card-video-.html

I had been wanting to try making an easel card and this looked so easy........ here is my version.
I used Bermuda Bay, Basic Black and Whisper White cardstocks, the new Scallop Trim border punch with matching corner punch, the new Heart of Hearts and Beautiful Wings embosslits, the new mini heart punch, Heart to heart punch and the full heart punch. The stamp set is With All My Heart stamped with Basic Black ink. The closed card size is 4"x4".


Thanks for stopping by,
Have a great weekend!

Sharri

Thursday, March 4, 2010

Vintage Vogue and Butterflies

This pretty card is very simply done; colors are Whisper White and Bermuda Bay. I rolled the Very Vintage wheel inked in Bermuda Bay across a piece of Whisper white cardstock twice to create a background, this was layered onto a piece of Bermuda Bay cardstock which was then layered onto a Whisper White card base. The oval is the centre from the oval frame Bigshot die. The flowers were stamped using the Vintage Vogue set and the Bermuda Bay classic ink, the different shades were created by stamping off once and then stamping on the whie cardstock. I trimmed these out and layered the two sizes these were then placed around the oval which has been sponged with Frost White Shimmer Paint along the edges. The sentiment was also inked with the Shimmer paint. I then finished it off by adding a layered Butterfly which is composed of three butterflies from the Beautiful Wings embosslit. The stamp set, wheel and the embosslit can be found in the new Occaisions Mini catalogue. The Shimmer Paint was introduced in the Holiday mini but is still available. The other supplies can be found in the current Idea Book and Catalogue.

Hope you like it!
Thanks for stopping by.

Have a great weekend!!
Sharri