Showing posts with label Scalloped Border Punch. Show all posts

Monday, May 9, 2011

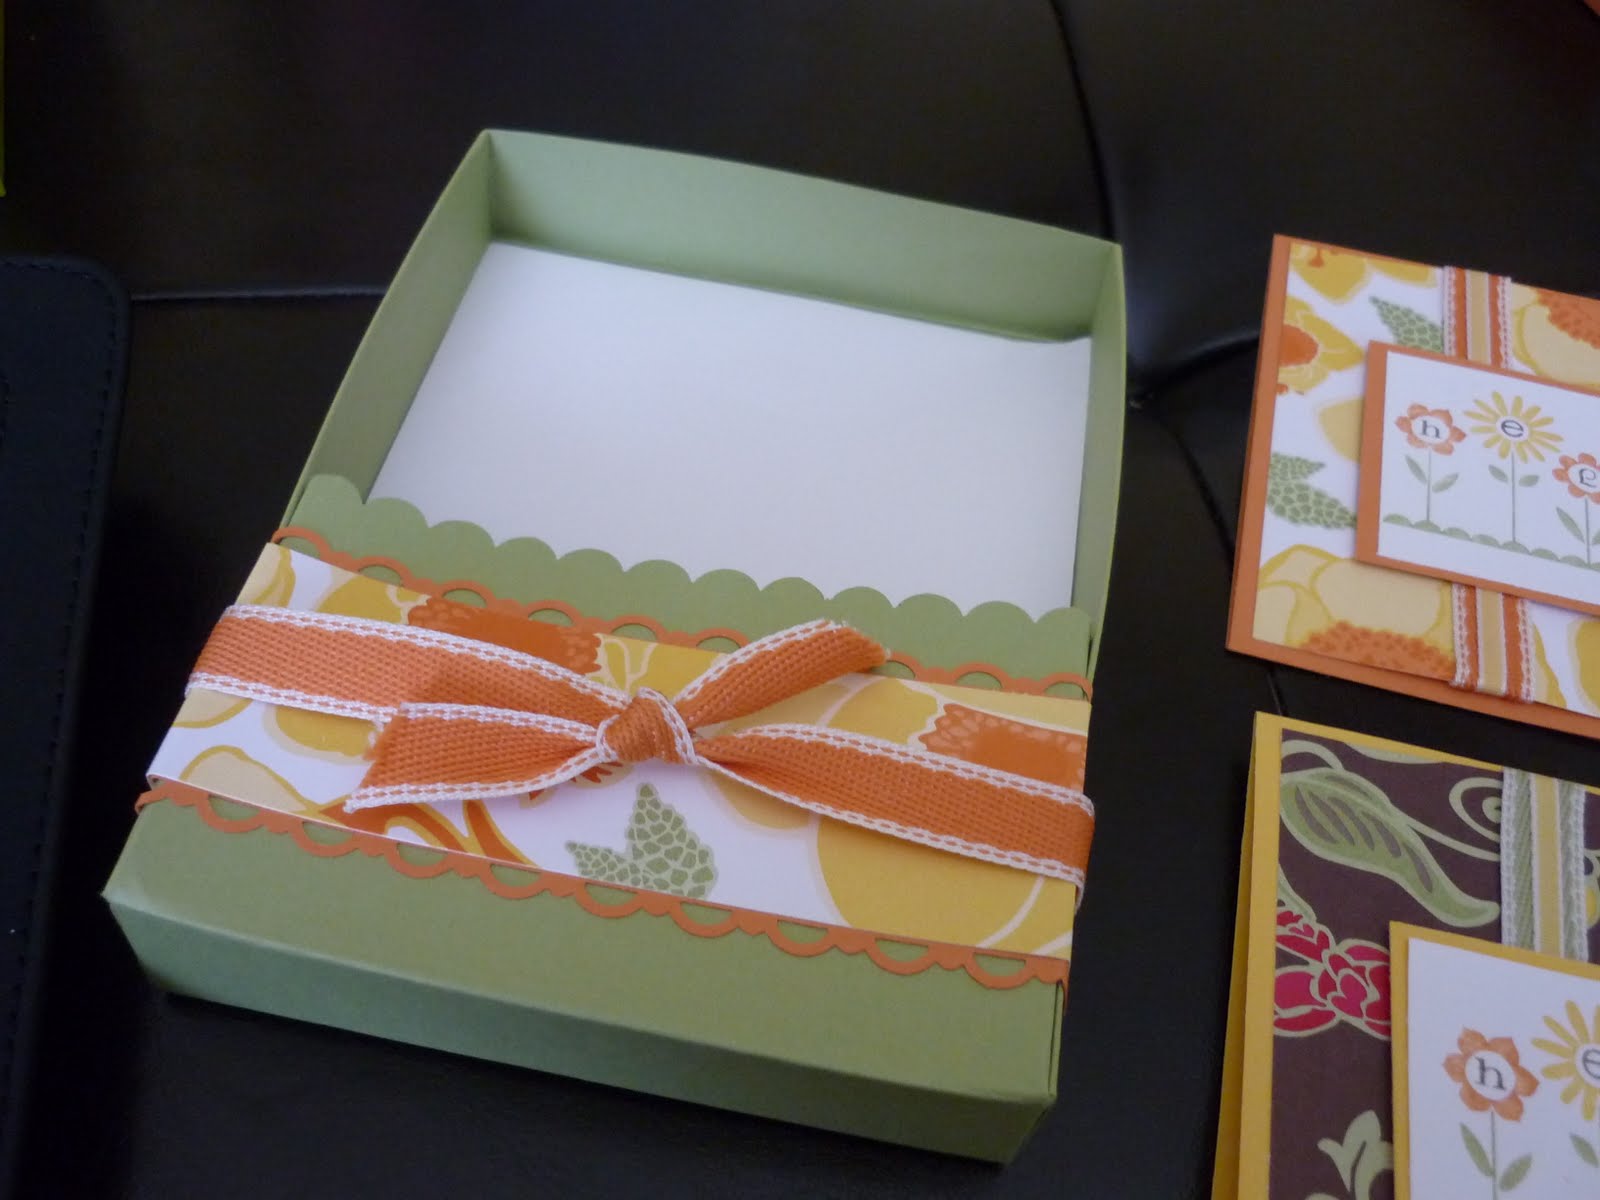
Greenhouse Gala and Hello Blossoms Card Sets

I made these cute cards sets for my niece and my daughter-in-law for gifts for Easter. The card box was cased from Elaine's Creations

They hold 3 cards and envelopes and really were easy to make.


The boxes were made using Pear Pizzazz and Peach Parfait cardstock They were decorated with the contrasting cardstock that has been punched with the scallop trim border punch on both sides and a strip of the DSP.
I then tied a piece of the 1/2 " poly stitched ribbon to match the contrasting cardstock.
                                            

The cards were cased from a fellow demo but I can't give credit because the picture I saved didn't have a watermark to identify the creator. I did change it up a fair bit.
Supplies used are :

Paper: Whisper White, Pear Pizzazz, Peach Parfait and Daffodil Delight, Greenhouse Gala DSP


Ink: Peach Parfait, Daffodil Delight, Soft Suede, Pear Pizzazz Stampin'Write Markers

Stamp Sets: Hello Blossoms

Accessories: Scallop Border punch, Pear Pizzazz and Peach Parfait poly stitched ribbon, Daffodil Delight 1/8" Taffeta ribbon,


These made simple but useful gifts for two young mothers.


Hope you will try these.


Thanks for coming by again!

Sharri


Wednesday, March 17, 2010

Mini Milk Cartons

This die is so much fun to play with. I've had great fun with it. I created a little basket to carry the pairs in. They're so cute!

This first set was created with the Sweet Pea DSP from the Occaisions Mini catalogue and Chocolate Chip C/S there is absolutely no stamping on these ones. I embellished the milk cartons with the Sweet Pea stitched felt flowers that are also in the mini and closed them with mini library clips. I'll fill them with some goodies for someone.

The basket is created by setting the two milk cartons side by side on my grid paper and then I added 4 inches to each measurement. and cut the card stock rectangle with these measurements. I then scored each side at 1" and 2" on all four sides and created a basic box bottom. The handle for the basket is a 12" length of C/S that has been punched along each side with the scallop border punch and the Pretty in Pink satin ribbon is placed in the centre of the handle and tied at the top.

This next set I made as a hostess gift for a friend who invited us for dinner on the weekend. I used Teaparty DSP, Certainly Celery C/S and the Etelet Border punch for the handle. The ribbon is some I had in my stash that seemed to go well with the DSP. I used the stamps from 2 different sets; Four Square and a retired set and punched them out with the scalloped square punch. I used Pink Pirouette papet to embellish the bottom of the milk cartons after punching a border with the eyelet punch.


Thses were so easy and quick to make. Hope you like them and get a chance to play with these sometime too. Stay tuned for more of these in the future.
Thanks for stopping by,
Sharri


Saturday, February 13, 2010

Vintage Vogue

This card was made for a color swap;black and white. I used the new Very Vintage Jumbo Wheel and the Vintage Vogue stamp set, both are found in the Occaisions Mini catalogue. The whell was inked in Basic Black and then rolled horizontally across the Whisper White, it was then layered onto a Basic Black card base, I then took a strip of black CS and used the scalloped border punch along the edge and placed it midway on the card front. I stamped the Friends image from Vintage Vogue, rounded the corners and layered it onto a rounded piece of black; this was all popped up on dimensionals. The sentiment was stamped with the shimmer paint which pulls in the half pearls that fit nicely in the scallops. These were from my stask and are non SU but I think the half pearls from the Pretties kit would work as well.

Hope you have a nice weekend,

Thanks for stopping by,

Sharri

Saturday, November 14, 2009

Bag in a box

I think this is what these are called....I love the look of them and they are so cute for small gifts or candy. They are created from a small box on the bottom the distance around should be around 11.5 inches total so you have a 1/2 inch overlap. You then take a 12x8-9 inch piece of DSP and wrap around the box lining it up at the bottom. I then took a strip of cardstock and used the border punches to create a decorative strip and again lined it up along the bottom of the box and wrapped it around the DSP(I like the narrower border better than the wider one). Punch out 2 round tab punches and fold in the center the place centrally on either side of the bag top to create a holder for the ribbon; try to align these so they are opposite each other. Punch a 1/4 inch hole just below the fold in each tab punch and thread a matching ribbon through and tie.
Decorate the bag as you would like. This worked up really quick once I decided on the DSP and color combo.
We're still under construction so I can't find anything...it all seems to get piled on my work table and then when I do get time to play I have to organize, soon to be done I hope.
Thanks for stopping by.

Sharri

Saturday, September 5, 2009

For Mia....


Mia is my grand daughter, she is 4 years old, soon to be 5 in November and even though she lives in Montreal, a days drive away, she keep us all on our toes. My husband will be driving through Montreal early next week so I made this card for him to take to her. She likes butterflies so, after casing the basic card from the new Holiday mini catalogue, I added them to the front for her.
It took me forever to figure out how I was going to make this so she could get the treats out of the card, I finally did after looking at several blogs to see how they were doing it. I eventually made a slider panel on the inside so it could be pulled out and the candy would fall out of the hole in the back. I made the slider by using strips of cardstock on 2 sides and the bottom that were popped up on strips from the sides of the dimensionals then the panel in front of the hole could slide in and out to retrieve the candy. This was my challenge for today.
I used Sweet Centers, Flight of the Butterfly and Teeny Tiny Wishes stamp sets, Mambo Melon and Bermuda Bay inks and cardstock, Whisper White cardstock and Mambo Melon Polka Dotted Ribbon as well as the butterfly and the scalloped border punches, and the new Sweet Centers cups all from Stampin'Up.
Hope you're enjoying your long weekend!
Thanks for looking, Sharri

Friday, August 28, 2009

Butterflies....


I love butterflies, dragonflies etc. and can't resist them at all.I cased this card from a blog but I'm sorry to say I can't remember who's, I saved the picture and recreated it. The stamp set is Flight of the Butterfly, the colors are Bermuda Bay and Soft Suede, two of the new In-colors all from Stampin'Up.
It's a very simple but elegant card. (please if you know the original designer of this card, let me know and I will be sure to give proper credit)

It is finally Friday, seems like it's been a long week!

Hope you have a great weekend! Sharri